
How to Plan and Execute Interior Painting, Basement Finishing, and Stucco Repair in 2026
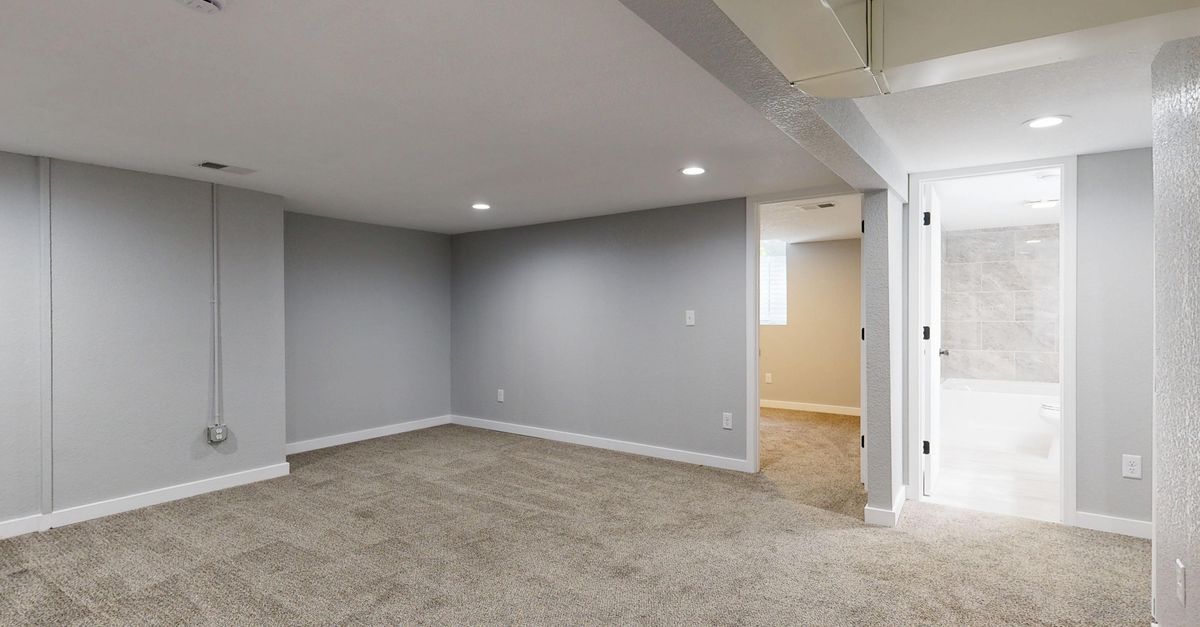
I’ve spent the last decade turning empty walls into living stories. Whether I’m laying out a new brand’s visual identity or repainting my basement to beat dampness, one thing stays constant: preparation wins over talent. Below is a step‑by‑step playbook that covers interior painting, basement finishing, and stucco repair while keeping an eye on eco‑conscious solutions.
1. Assess Your Project Scope and Goals
The first move in any paint job is to map out the work you actually need. Do you want a single accent wall or a full‑room makeover? Is your basement only a storage space, or will it become a living area? Clarifying these goals early prevents wasted time and money.
Ask yourself: What’s the primary function of the space? How much traffic does it see? Which surfaces need repair before paint can be applied? These answers dictate material choice, surface prep, and whether you’ll hire professionals or tackle it DIY.
Key Checklist Before You Buy Paint
- Measure square footage of walls and ceilings.
- Identify moisture sources (leaks, condensation).
- Inspect for mold, cracks, or loose stucco.
- Decide on finish: flat for hiding imperfections, satin for high‑traffic rooms.
- Set a realistic budget that includes prep work and contingency funds.
Once you’ve completed this checklist, you’ll have a clear picture of the scope and can confidently move to material selection.
2. Choosing the Right Paint Types for Interior vs Basement
Interior walls often receive low‑VOC latex paints that balance durability with odor control. Basements, however, demand moisture‑resistant formulations: either mold‑inhibitor latex or a specialized epoxy base if the area is prone to dampness.
I’ve found that satin or semi‑gloss finishes work best in kitchens and bathrooms because they’re easy to wipe down, while flat paints are ideal for bedrooms where light absorption matters. In basements, consider an oil‑based primer first; it seals pores and prevents moisture from seeping through.
Comparing Paint Finish Options
- Flat: hides imperfections, low sheen.
- Satin: moderate gloss, easy to clean.
- Eggshell: slight sheen, good for living rooms.
- Semi‑gloss & Gloss: high durability, ideal for trim and high‑traffic zones.
Choosing the correct finish saves you from repainting later when hidden flaws become visible.
3. Eco‑Conscious Painting Solutions
Low‑VOC paints are not just a trend; they’re a responsibility toward indoor air quality and the planet. In 2026, manufacturers offer zero‑VOC options that still provide excellent coverage and durability.
When selecting eco‑friendly paint, look for certifications like Green Seal or EcoLabel. Recycled content is another factor—some brands incorporate recycled plastic into their pigment mix, reducing waste.
Top Eco‑Paint Features to Look For
- Low or zero VOC levels.
- Recycled or bio‑based pigments.
- Packaging made from post‑consumer plastics.
- Water‑borne instead of solvent‑based formulations.
- Certified by independent environmental agencies.
Adopting these products keeps your home healthier and aligns with a broader sustainability mission. Many eco paints also come in vibrant colors that don’t fade quickly, so you can experiment without fear of future touch‑ups.
4. Preparing Walls and Surfaces Before Paint
Surface prep is the backbone of lasting paint jobs. I always start with cleaning, then move to repair before priming. Dust, grease, and loose material can prevent adhesion, leading to peeling.
For stucco repair, first check for cracks larger than a pencil width. Use a high‑strength mortar mix to fill gaps, then sand smooth once it dries. If the stucco is severely damaged, replace sections with new plaster or a modern stucco composite designed for low maintenance.
Step‑by‑Step Prep Routine
- Sweep and vacuum walls to remove dust.
- Wash surfaces with mild detergent; rinse thoroughly.
- Fill cracks with spackling or mortar as appropriate.
- Sand all patched areas smooth.
- Apply primer suited to the wall material (latex for drywall, epoxy for concrete).
A meticulous prep phase means paint adheres better and lasts longer, especially in moisture‑prone basements.
5. Applying Paint: Techniques for Even Coverage and Durability
I use a roller system with a 3‑in. nap for walls and a brush for corners. For ceilings, a larger roller or an automatic paint sprayer gives the best uniformity. Start from top to bottom: cut in edges first, then roll.
When you reach mid‑height, apply two coats at least; the second coat compensates for absorption differences between wall and ceiling. Always let each layer dry according to the manufacturer’s guidelines—usually 2–4 hours for latex.
Tips for a Professional Finish
- Use a paint conditioner to reduce brush marks.
- Apply thin, even coats; avoid puddles.
- Maintain a wet edge while rolling.
- Check for drips and touch up immediately.
- Ventilate the room throughout the process.
Following these steps guarantees a smooth surface that feels like it was painted by an expert. If you’re working in a tight space, consider using angled rollers or smaller brushes to reach corners without compromising coverage.
6. Basement Painting Specifics: Moisture Control, Mold Prevention, Finish Choices
Basements are notorious for dampness and mold spores. Before painting, seal any leaks in the foundation or walls with hydraulic cement and ensure proper drainage outside.
Use a primer containing mold inhibitors; this creates a barrier that stops fungi from thriving under paint. For finish, a satin or semi‑gloss is preferable because it resists moisture and is easier to clean—ideal for spaces that might get wet during spills or seasonal dampness.
Basement Painting Checklist
- Inspect foundation for water seepage.
- Apply hydraulic cement sealant where needed.
- Use mold‑inhibiting primer on all walls and ceilings.
- Select satin or semi‑gloss finish.
- Install dehumidifier if humidity exceeds 50%.
When these precautions are in place, your basement can transform from a storage closet into a comfortable living area without the fear of hidden mold.
7. When to Call Professional Painting Services vs DIY
Even seasoned homeowners sometimes misjudge what’s feasible alone. Here’s when to bring in pros:
Professional Situations
- Large‑scale projects exceeding 1,000 sq ft.
- Complex trim or architectural details.
- Structural stucco repair beyond simple patching.
- High‑risk mold remediation in basements.
- Need for specialized eco‑paint certifications.
DIY is suitable when you have a clear scope, access to tools, and at least 10–12 hours of focused work. If the job feels overwhelming or your schedule tight, hiring professionals saves time and guarantees quality.
8. Cost Estimation and Budgeting Tips
Paint costs vary by finish, brand, and eco‑rating. On average, a gallon of high‑quality latex paint costs $25–$45; primers add another $10–$20 per gallon. For a 200 sq ft room, you’ll need roughly 3 gallons.
Budget for prep materials—spackling, sandpaper, masking tape—and tools if you’re buying them new. A typical basement paint job (including moisture control) ranges from $1,500 to $4,000 depending on square footage and repair needs.
Sample Cost Breakdown
- Paint: 3 gal × $35 = $105.
- Primer: 2 gal × $15 = $30.
- Prep materials: $50.
- Tools rental (roller, brush): $25.
- Total DIY estimate: ~$210 per room.
When hiring professionals, get a written quote that includes labor, paint, and disposal fees. Compare at least three bids to avoid overpaying. Remember that some contractors bundle dehumidifier installation or mold remediation into their price, which can shift the total by 10–20%.
9. Safety and Health Considerations
Painting involves chemicals that can affect both skin and air quality. Always wear protective gloves, goggles, and a respirator if you’re working in a poorly ventilated area or using solvent‑based products.
For basements, keep an eye on humidity levels; excess moisture not only promotes mold but also makes paint feel tacky and may reduce adhesion. A hygrometer is a cheap tool that provides real‑time data so you can adjust ventilation or dehumidifier settings accordingly.
After the job, dispose of old brushes, rollers, and leftover paint according to local regulations. Many municipalities have hazardous waste collection days; check your city’s website for details. Proper disposal protects the environment and keeps future projects safe.
10. Common Mistakes and How to Avoid Them
Avoiding pitfalls keeps your project on schedule:
- Skipping primer—especially on new drywall or stained surfaces.
- Over‑rolling, which can leave visible roller marks.
- Not masking trim properly, resulting in paint bleed.
- Using too low a VOC paint when moisture is present.
- Ignoring proper drying times between coats.
Double‑check each step before moving on. A simple “paint‑pause” review after the first coat can catch errors early. Also, keep a small bucket of water or cleaning solution nearby for quick touch‑ups; this helps maintain a flawless finish without waiting for a new project cycle.
11. Final Touches: Finishing, Clean‑Up, and Maintenance Plan
Once paint dries, remove masking tape carefully to avoid peeling. Inspect for drips or uneven spots; a quick touch‑up with a small brush can seal the job.
Maintain your fresh walls by cleaning them every six months with a mild detergent solution. For high‑traffic areas, consider a light coat of wax or a washable paint finish that resists scuffs.
Maintenance Routine
- Wipe surfaces monthly with a damp cloth.
- Spot clean stains immediately to prevent deep penetration.
- Check for cracks after temperature changes; seal promptly.
- Inspect basement humidity quarterly and adjust dehumidifier settings.
A proactive maintenance plan extends the life of your paint job and keeps your home looking pristine. If you notice any new moisture issues, address them before they spread—early intervention saves both money and effort in the long run.
Key Takeaway: Meticulous prep, right material selection, and clear goal setting are the three pillars that turn a simple paint project into lasting value. What’s the most common mistake you’ve seen homeowners make when painting basements?


